Votre panier
Il n'y a plus d'articles dans votre panier
INSTRUCTIONS POUR L'UTILISATION DES BOÎTES DE COMBINATEURS
1. Nos produits étant utilisés dans des circuits électriques, ils doivent être montés par du personnel qualifié pour ce type de montage et conformément aux réglementations électriques en vigueur sur le lieu d'installation.
2. Ils doivent être utilisés par un personnel technique qualifié, conformément aux instructions.
3. Le câble approprié doit être choisi pour les connexions de nos produits. Une méthode de soudure ou de brasage est utilisée pour les connexions de câbles et les points de connexion sont serrés avec une force appropriée.
4. Il ne doit pas être utilisé en dehors de la catégorie de protection IP spécifiée.
5. Tant qu'il est alimenté en électricité, il ne doit pas être monté ou modifié.
6. Nos produits ne sont pas destinés à être utilisés dans des atmosphères explosives, dans des ménages ou marine.
7. Bemis Teknik Elektrik A.Ş n'est pas responsable des accidents causés par le non-respect des instructions.
8. Deux représentants de Bemis Teknik Elektrik A.Ş. doivent être présents à la commission d'experts qui est formée pour la détection des situations accidentelles qui peuvent se produire en raison de la défaillance de nos produits. Cet article est le standing des conditions spéciales. En cas de litige, les tribunaux de Bursa (Turquie) sont compétents.
9.La période de garantie est de 2 ans si l'appareil est utilisé conformément aux instructions de montage et d'utilisation. En cas de mauvaise utilisation ou de mauvais montage, le produit n'est pas couvert par la garantie.
Les produits de la marque Bemis sont fabriqués par Bemis Teknik Elektrik A.Ş.
Modèle du guide d'installation
1. Ouvrez le couvercle avant en dévissant les 4 vis.
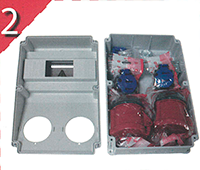
2. Vérifiez les matériaux à l'intérieur selon le code produit.
3. Connectez les fils aux prises avec des fils de section et de longueur appropriées.
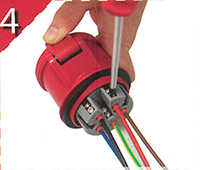
4. Raccordez les câbles des prises avec des câbles de section et de longueur appropriées.
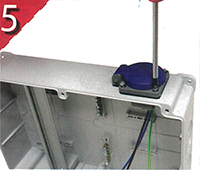
5. Fixez les bouchons latéraux aux trous préparés à l'aide des vis qui en sortent.
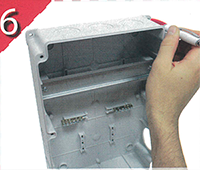
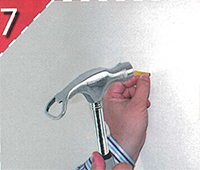
6. Tout d'abord, marquez les endroits à percer en 4 points comme indiqué sur l'image.
7. Insérez les chevilles de
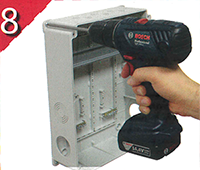
8. Fixez la combinaison avec les vis de
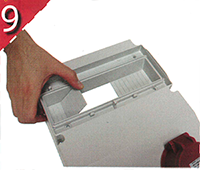
9. Ouvrez l'espace du distributeur automatique autant que le nombre de distributeurs automatiques à installer.
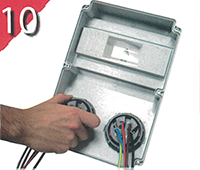
10. Fixez les douilles avec les écrous en les tournant comme indiqué sur la photo.
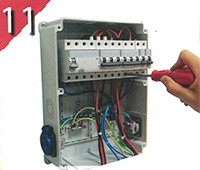
11. Placez les distributeurs automatiques sur le rail et effectuez les connexions de câbles.
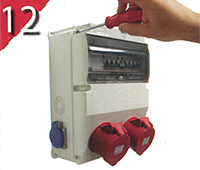
12. Préparez le fonctionnement en mettant en place le couvercle combiné.
Guide d'installation
Construccines PBR s.l. (ADAJUSA), certifie que les données présentées ici sont une reproduction fidèle des données fournies par le fabricant.
|
|
|
|
|
|
|
|
|
|
|
|
|
|
|
|